QUESTION:
How do I test a controller?
RM – Los Angeles, CA
ANSWER:
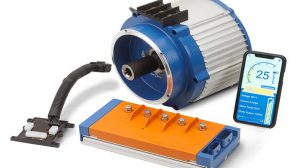
Another one of those questions without a quick easy answer. Everyone from a dealer to an end user wants that quick easy fix! What the industry has done for us is to create a system of easy testing, IF you have the proper test equipment. Test equipment such as programmers has been around for many years. The problem is the cost! Secondly one does not fit all. So, what is an individual to do? My staff and I field this question on a daily basis many times over! So I am going to give you some basic principles and testing without the use of high dollar programming equipment.
First understand a controller is part of a system and does not stand alone. Secondly understand testing is done in two directions. One I like to call the Known Factor and one I call the Unknown Factor. So with those thoughts in mind let’s use the following example.
•          What brand of car?
•          What type of system is in the car SepEx or Series?
•          What does the car do or not do?
Let’s say for this example we have a Club Car IQ system. The car does not run. What is the first action taken at this point?
This is where we start with known factors. First we retrieve the correct wiring diagram for that system. We know the car must have a voltage supply and that is the battery pack so we confirm proper voltage OCV and load voltage. Next we confirm we have conductors for the voltage to flow. In other words check all power cables, wiring and perform a good visual inspection.
Now we look at the Unknown Factors. What we do not know at this point is what does the solenoid do (does it click)? You do not go any further with trouble shooting until we determine what is going on with the solenoid.
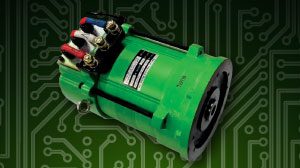
Solenoid clicks but does not run. Check the main contacts for being open. If open, replace the solenoid. If the solenoid checks good then we go on to motor/controller testing. Keep in mind we are testing a system so we are testing everything around the controller at this point. Too often we just jump the gun and fail to follow procedure. Be patient and go step by step to each area of testing. Now we check the motor for continuity through F1 to F2 and A1 to A2 with one each of the cables removed. If we have continuity then we can say a circuit exists though the motor. So, at this point we have checked everything around the controller, so that leaves only one thing, a defective controller.
Going back to the solenoid, it does not click. First we determine if voltage is present across the small solenoid terminals. If we read 48 volts and the solenoid does not click, replace the solenoid. If you do not read voltage we have to determine where we are losing the voltage. Check voltage at the solid blue wire. Now we move our negative voltmeter lead to battery number six negative terminal and leave the red voltmeter lead connected to the small blue wire. Activate the system and if 48 volts is not read we have issues in the key switch, tow switch to battery positive circuit. If we read 48 volts then check for a negative potential on the blue wire with white stripe. Connect the black voltmeter lead to the blue wire with white stripe and move the red voltmeter lead to battery number one positive terminal. Activate the system and if 48 volts is not present we need to check voltage potentials at the controller inputs.
 This is why it is important to have the correct wiring diagram for the car! Now we have to test in-put voltages to the controller. On this particular car system the computer has a lot to do with solenoid activation. Notice that the yellow wire from the computer is connected to the foot pedal switch and to the controller. This tells us we must see 48 volts positive at pin 6 on the controller at system activation. If you do not you have wiring issues, foot switch issues, key switch issues, tow switch issues or battery connection issues. This positive voltage must be seen in order for the controller to send out a negative input to the solenoid. You must also see voltage at the red computer wire, light blue, green/white wires to and from the computer (positive). If all is well then check input voltages at pin 6,10,8, and 9 on the controller (positive). Voltages present and no solenoid activation; replace the controller. Voltage not present; replace the computer or find where voltage to the computer/controller is missing. Also confirm POT (potentiometer/ITS) voltage or resistance values. At this point you have tested the system and can now determine if the controller is defective.
 Plain and simple procedure without the use of high dollar test equipment!